Host Setup #
This document explains how to install and manage a self-hosted CoSync Auth Server host that supports JWT authentication for a MongoDB App Services application.
As a prerequisite for this installation process, the developer will need
- An account on the CoSync Portal
- A MongoDB Developer account on MongoDB
- A Send Grid API key for emails on SendGrid
- A Microsoft Azure account on the Azure Portal
- Familiarity with Visual Studio Code Visual Studio
Moving forward in this tutorial, all projects and server names will be called Jojo - which is the name of my previous dog (a Queensland Heeler)

The steps used to create the CoSync Auth Server self-host product are detailed below:

CoSync Auth Server #
The first step in the process is go to the GitHub CoSync Auth Server site and download the code to a local machine
To clone the repo to a local directory, type this into the shell
git clone git@github.com:Cosync/CosyncJWT-Server.git
Once the CosyncJWT-Server directory has been created, you will need to install the Node dependencies. But first you must make sure that you have the latest version of NodeJS. Since Microsort Azure will use the latest version of NodeJS, you must also initialize the node_modules directory using the latest version. To upgrade to the latest version us nvm, type:
nvm install --lts
Once the latest version of NodeJS is installed, configure the CoSync Auth Server self hosted app by typing:
npm install
Private/Public keys #
The next step is to generate public/private keys for the CoSync Auth Server self-hosted product.
Each key will have to have a password, in our case we will choose jojo123 as the password. We absolutely recommend selecting a stronger password in a production environment. This is just an example!
To generate the private key type:
openssl genrsa -aes128 -passout pass:'jojo123' -out privatekey.pem 3072
This will create a file called privatekey.pem.
To generate the public key type:
openssl rsa -in privatekey.pem -passin pass:'jojo123' -pubout -out publickey.pem
This will create a file called publickey.pem.
The purpose of the public/private key pair is to utilize them for signing CoSync Auth tokens. The self-hosted server employs the private key to sign tokens, while the application utilizes the public key to decrypt and authenticate the identity of the server. It is of utmost importance for the developer to strictly refrain from sharing the privatekey.pem file and its associated password, as doing so could potentially allow impersonation of the server’s identity.
The concept behind public/private key encryption is that information encrypted with a private key can only be decrypted using the corresponding public key. This approach enables the private key to act as a “signature” for information, such as a JWT token, while the public key serves to validate the source’s identity.
Once the two files privatekey.pem and publickey.pem have been generated, they should both be moved to the config subdirectory underneath CosyncJWT-Server directory. The two files that are there, should be replaced by the newly generated files.
MongoDB Configuration #
The CoSync Auth Server self-hosted product requires MongoDB Atlas as a backend data-base to store application and user credentials. For the developer will need a MongoDB account and MongoDB Atlas cluster to support this authentication product.
MongoDB is reachable at the following URL:
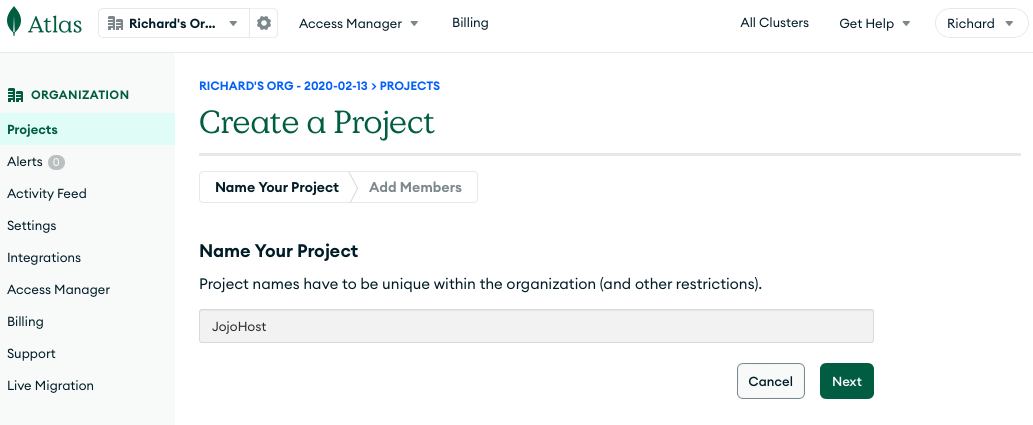
In the first step, create a project called JojoHost
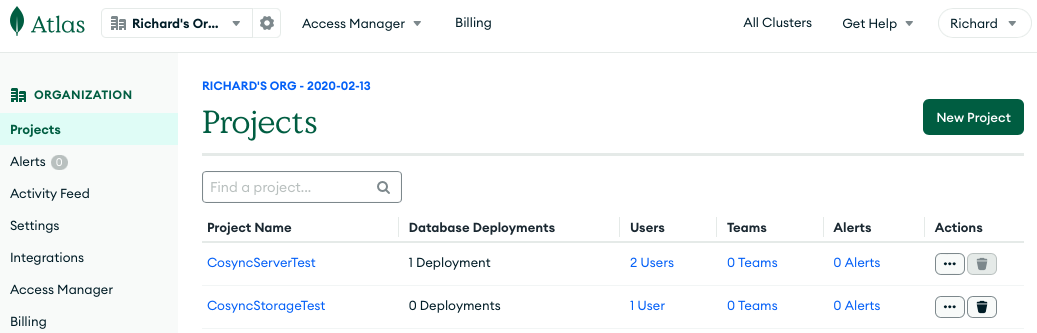
Hit the New Project button and type in JojoHost:
After the JojoHost project is created, you will be prompted to create a data base.
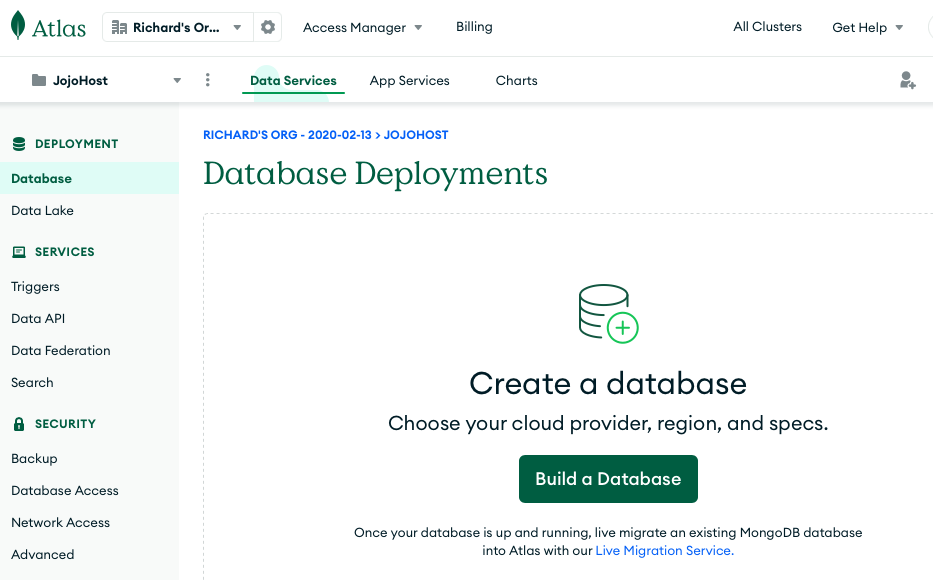
To start you can pick M0 Free and name the database JojoDB
Once the JojoDB data base has been created, you will be prompted to set up security configuration in the Security Quickstart page. The first thing to do is to create a user name and a password. In our case, the user name is richard and the password is oekztRmNEXc0H6vK. Copy the password to the clipboard, and then hit Create User.
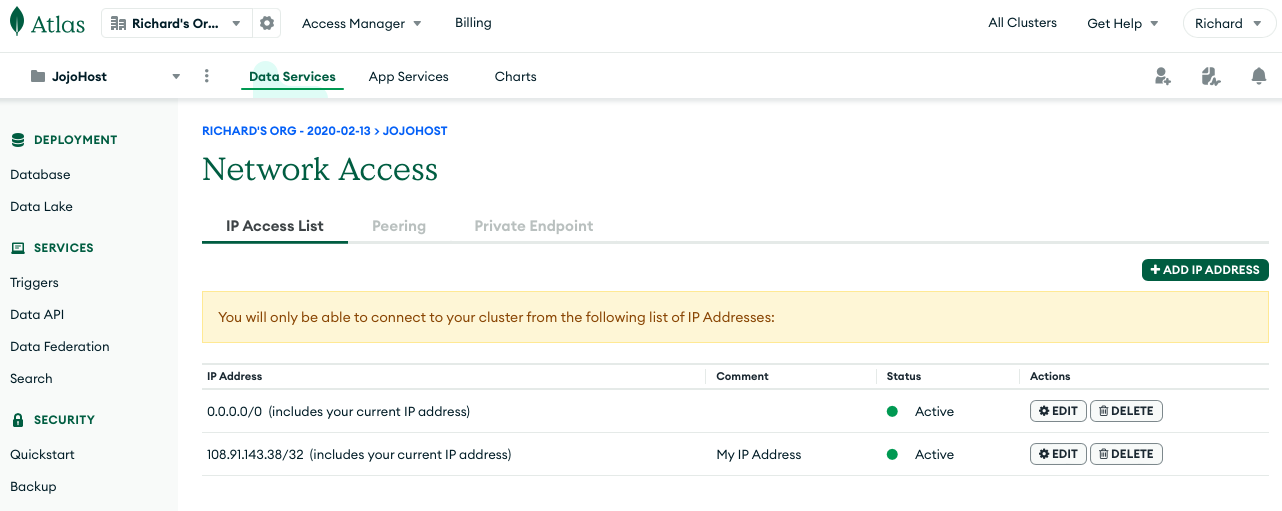
The second thing to do is to add your current IP address to the valid IP Access List. To do this, click the button called Add My Current IP Address. Next go to the Network Access Page by clicking the link with that name. Click the ADD IP ADDRESS button, followed by ALLOW ACCESS FROM ANYWHERE (don’t worry we can restrict this later on). To fix this security risk, consult the last section of this document. For the purpose of getting your CoSync Auth self hosted server up and running add ALLOW ACCESS FROM ANYWHERE.
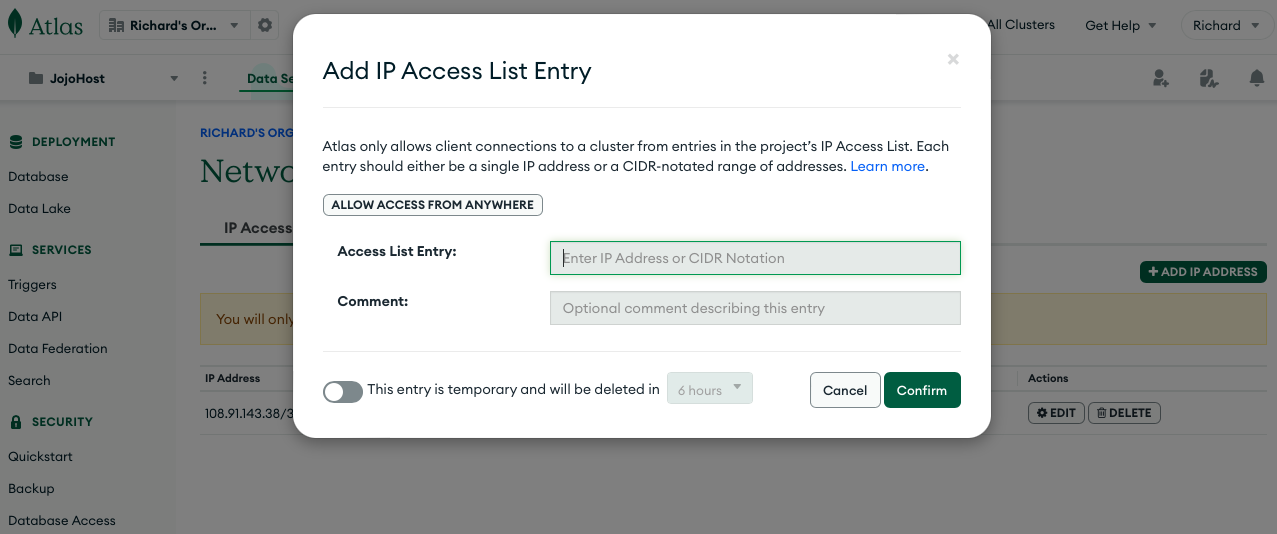
After you allow access from anywhere, your Network Access page should look as follows:
Hit Finish and you should be taken to a page that looks like this
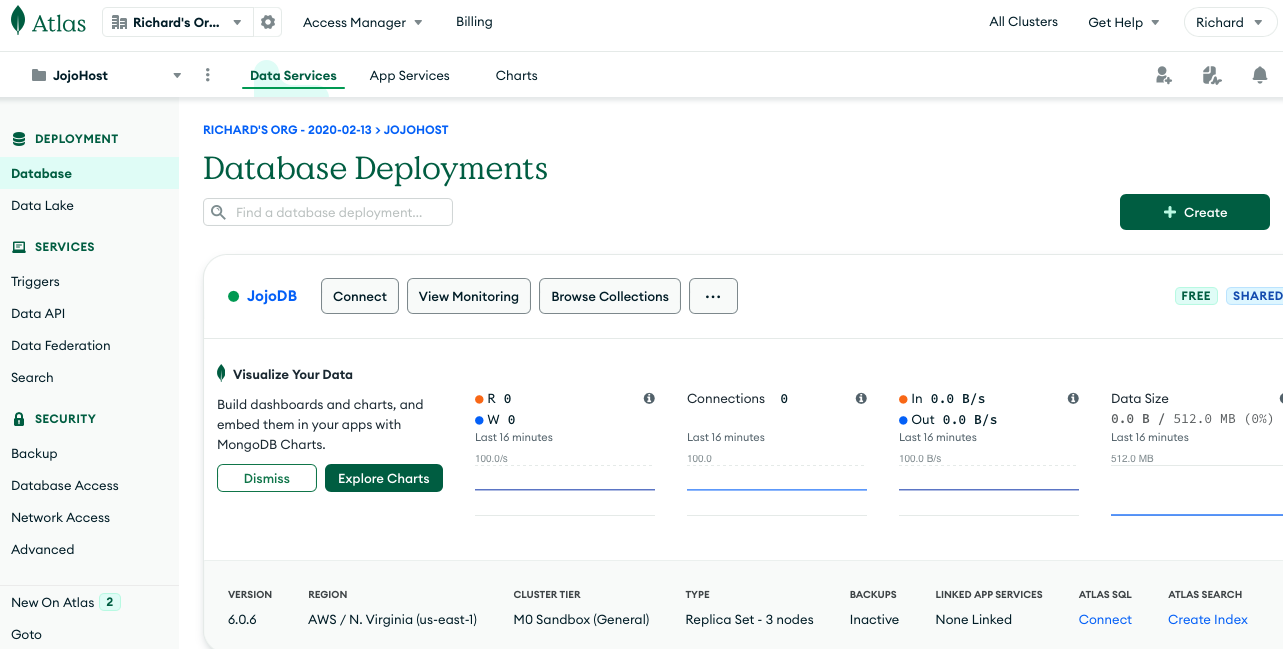
From this page, hit the Connect button, to configure how your MongoDB data base will connect to the CoSync Auth Server self-hosted service.
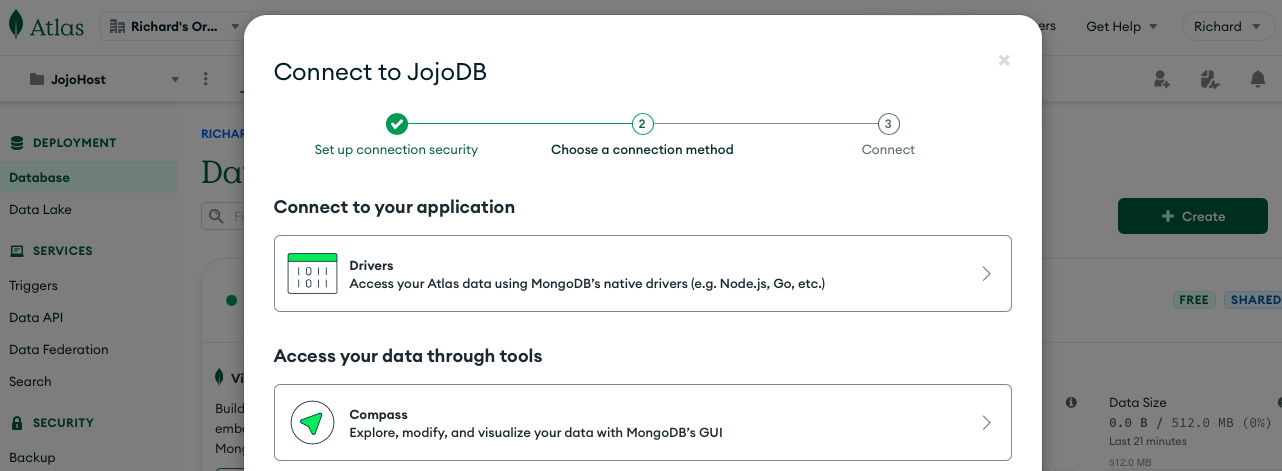
From this page, hit the Drivers row, to configure how your MongoDB connection parameters. This should lead you to the following screen:
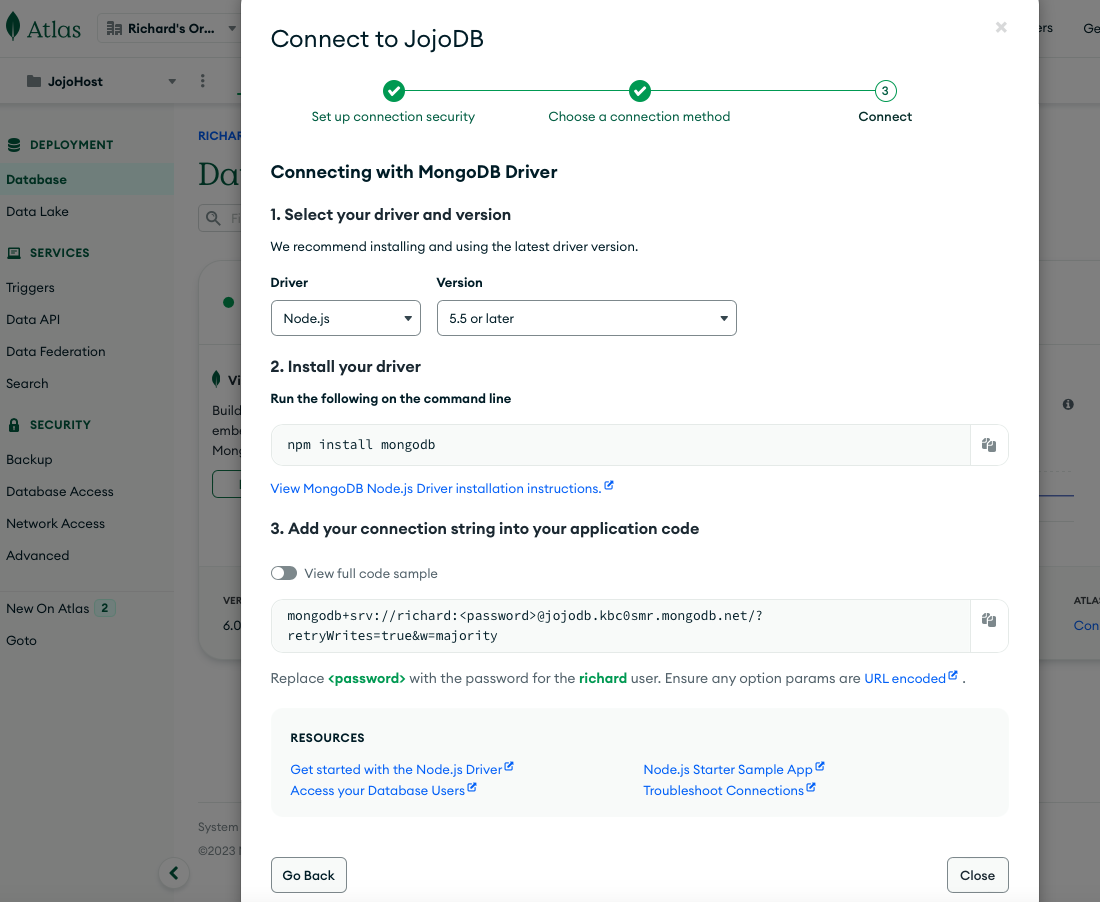
Copy the connection string to the clipboard and you should get the following
mongodb+srv://richard:<password>@jojodb.kbc0smr.mongodb.net/?retryWrites=true&w=majority
Replace the <password> with the password you saved above oekztRmNEXc0H6vK. Also add a data-base name after mongodb.net/, in our case JojoDB.
mongodb+srv://richard:oekztRmNEXc0H6vK@jojodb.kbc0smr.mongodb.net/JojoDB?retryWrites=true&w=majority
Do not share this with anybody!!! This is your connection string that allows the CoSync Auth Server self-hosting application to communicate with the JojoDB MongoDB database.
Microsoft Azure Configuration #
The next step is to configure a Microsoft Azure account. If you do not have one, go ahead and create one at
It is Microsoft Azure that will be running the instance of the CoSync Auth Server self-hosted application, which integrates with the CoSync Portal at https://portal.cosync.net. The CoSync Auth Server will run on top of NodeJS within a Microsoft Azure app service.
Create an App Service #
When you are logged into Azure, create an App Service by clicking on the App Services button at the top left.
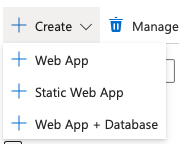
Then create a web app app by clicking on Web App.
This will bring up the Create Web App page as shown below
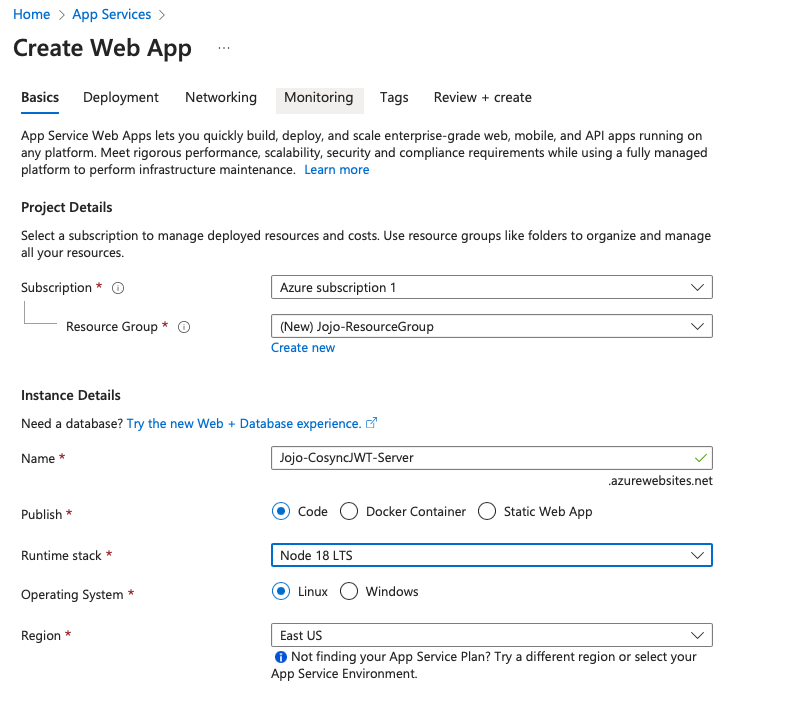
Make sure that you create a new ressource group called Jojo-ResourceGroup. And name the product Jojo-CosyncJWT-Server. And select Node 18 LTS for the runtime stack - or the latest version of NodeJS.
Then go ahead and create the Web App.
Once deployed you should get a screen to this effect:
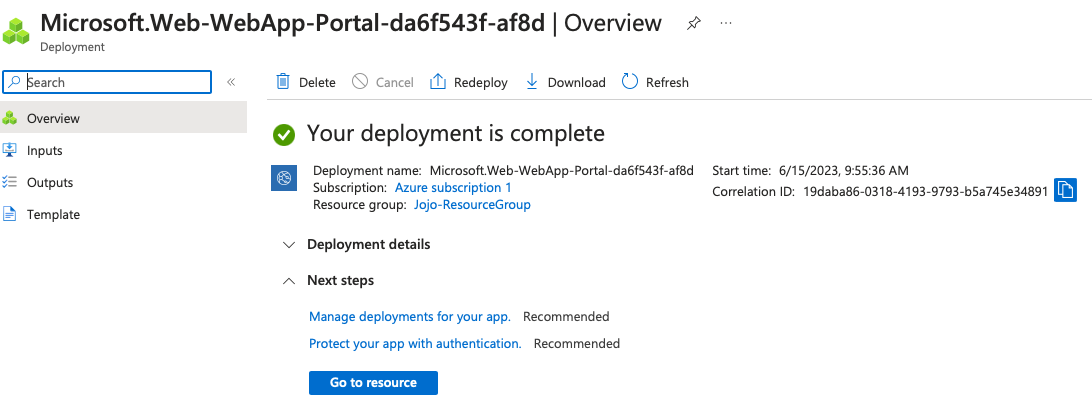
Now that your Azure app service is deployed, hit the button called Go to resource, and you should see the following screen:
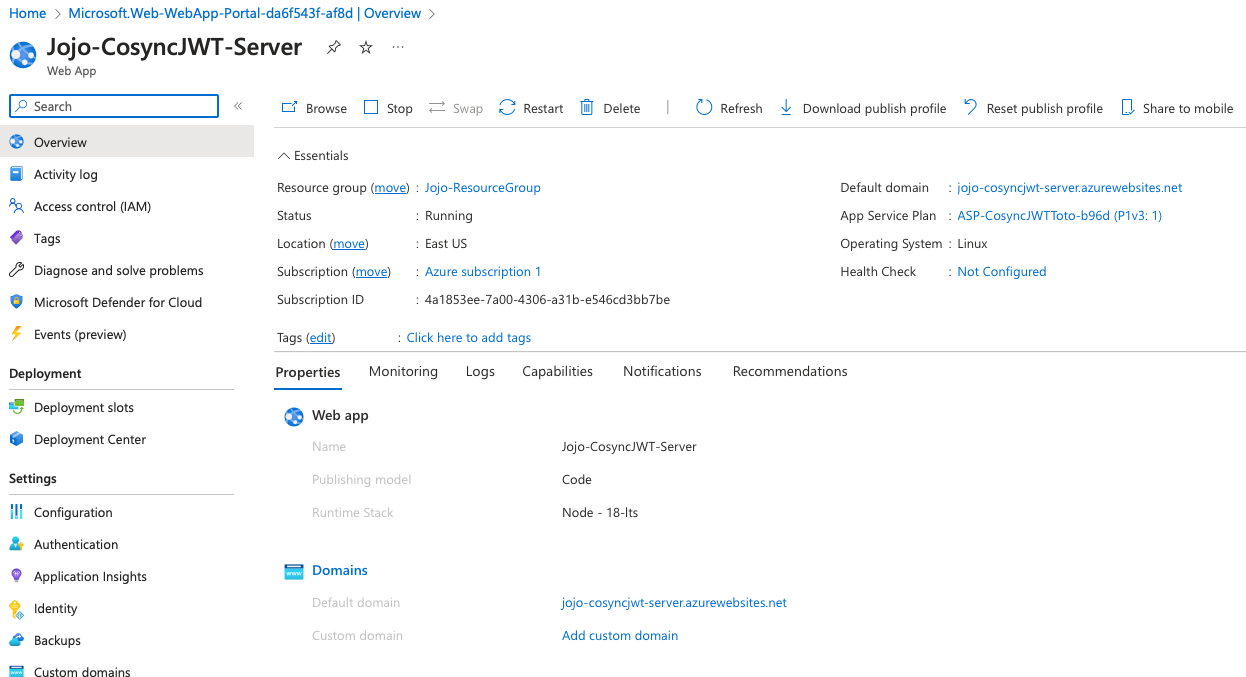
Go ahead and copy the string associated with Default domain
jojo-cosyncjwt-server.azurewebsites.net
Add the https prefix and you have the URL for your self hosted CoSync Auth Server.
https://jojo-cosyncjwt-server.azurewebsites.net
You now have the Azure portal configured and are ready to move on to the next step
Deploy CosyncJWT-Server to Azure #
The next step in the configuration process involves deploying the CosyncJWT-Server to Azure, specifically to the Jojo-CosyncJWT-Server app service that you created previously.
Edit Config.js #
For this, you will first need to fill in the config.js file underneath the config directory of CosyncJWT-Server. First, create this config.js file by making a copy of the file config_default.js.
	cd config
	cp config_default.js config.js
Bring up CosyncJWT-Server in Visual Studio Code.
Go do Visual Studio and fill in the config.js file as shown below:
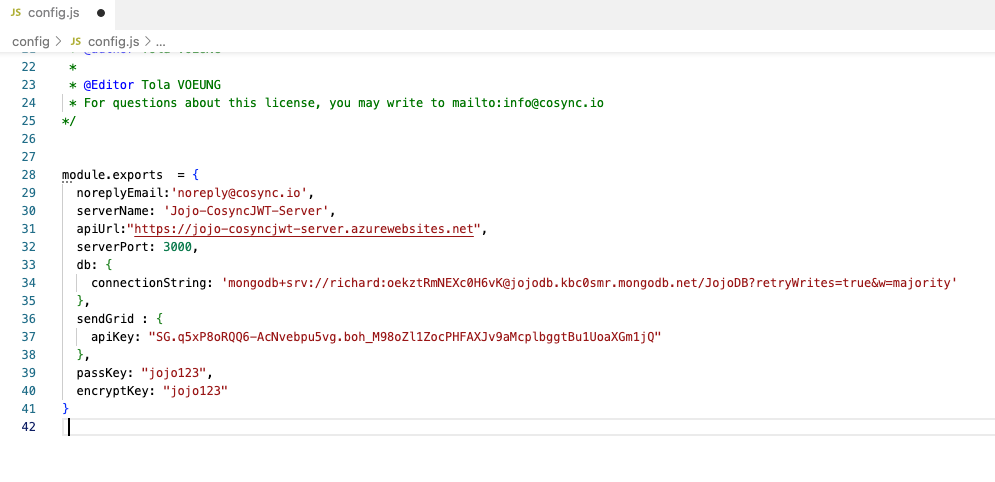
- Put a noreplyEmail consistent with your domain.
- Put a server name (in our case Jojo-CosyncJWT-Server)
- Put the API url that your Azure app service will present (in our case https://jojo-cosyncjwt-server.azurewebsites.net)
- Put the MongoDB connection string saved above mongodb+srv://richard:oekztRmNEXc0H6vK@jojodb.kbc0smr.mongodb.net/JojoDB?retryWrites=true&w=majority
- Put in your SendGrid API key
- Put the password used to encrypt the public/private keys at the start jojo123
- Put a AES password used to encrypt the MongoDB data base content, again jojo123 but could be different
All the user and application data saved within the MongoDB data base is AES encrypted using the encryptKey. This provides an additional layer of security should your data-base become compromised.
Save the config.js file, you are now ready to upload the CosyncJWT-Server code to the Azure app service.
Deploy to Azure #
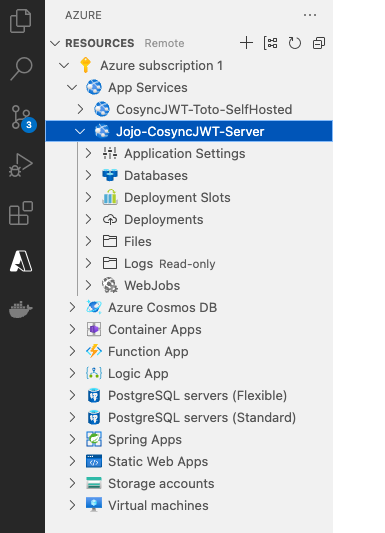
The next step involves using Visual Studio to upload the CosyncJWT-Server code to the Azure app service. To access Azure from within Visual Studio, click the Azure icon on the left toolbar. If there is no icon, make sure that the Azure extension is installed within Visual Studio. Also, login to your Azure account first.
Once you are logged into Azure, find your app service Jojo-CosyncJWT-Server as shown below
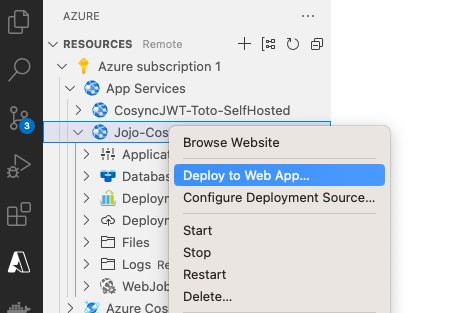
Right click on Jojo-CosyncJWT-Server and select Deploy to Web App, as shown below
Select Browse and select CosyncJWT-Server as the directory to deploy
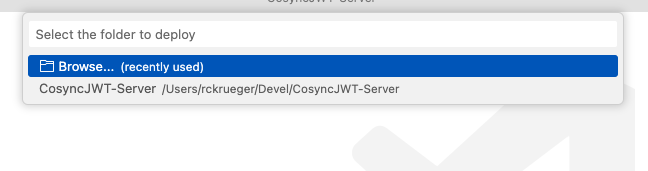
A directory will come up, and hit Select
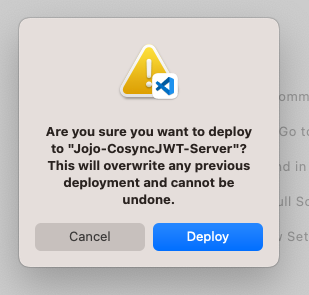
Lastly, hit Deploy in the model that is displayed
This will take a few minutes, once completed you can browse to the deployed URL by clicking Browse, and you should see

Congratulations, your app service Jojo-CosyncJWT-Server is now running a self-host CoSync Auth authentication server!
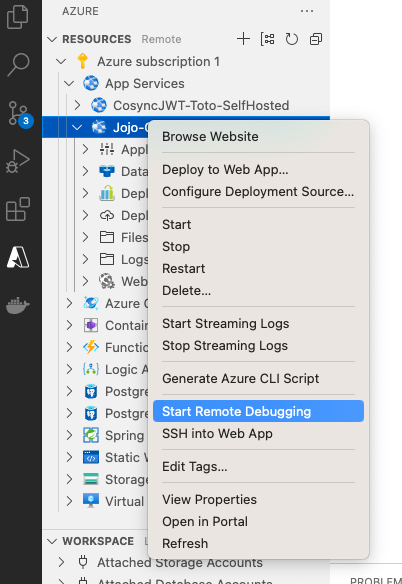
In the last step you need to retrieve your app service’ secret token, which will be used to tie it into the CoSync Auth portal. This step involves starting Remote Debugging as shown below
Once the remote debugging is started, you should see the following in the Debug Console of Visual Studio
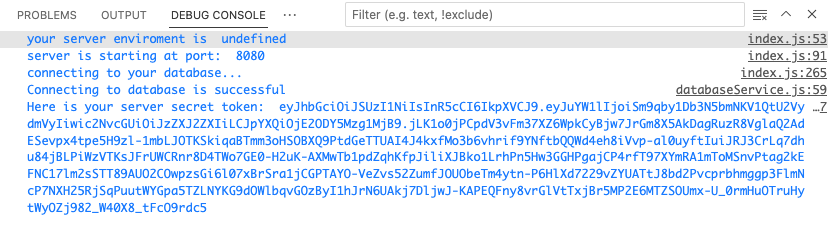
Copy the server secret token to the clipboard
eyJhbGciOiJSUzI1NiIsInR5cCI6IkpXVCJ9.eyJuYW1lIjoiSm9qby1Db3N5bmNKV1QtU2VydmVyIiwic2NvcGUiOiJzZXJ2ZXIiLCJpYXQiOjE2ODY5Mzg1MjB9.jLK1o0jPCpdV3vFm37XZ6WpkCyBjw7JrGm8X5AkDagRuzR8VglaQ2AdESevpx4tpe5H9zl-1mbLJOTKSkiqaBTmm3oHSOBXQ9PtdGeTTUAI4J4kxfMo3b6vhrif9YNftbQQWd4eh8iVvp-al0uyftIuiJRJ3CrLq7dhu84jBLPiWzVTKsJFrUWCRnr8D4TWo7GE0-H2uK-AXMwTb1pdZqhKfpJiliXJBko1LrhPn5Hw3GGHPgajCP4rfT97XYmRA1mToMSnvPtag2kEFNC17lm2sSTT89AUO2COwpzsGi6l07xBrSra1jCGPTAYO-VeZvs52ZumfJOUObeTm4ytn-P6HlXd7229vZYUATtJ8bd2Pvcprbhmggp3FlmNcP7NXH25RjSqPuutWYGpa5TZLNYKG9dOWlbqvGOzByI1hJrN6UAkj7DljwJ-KAPEQFny8vrGlVtTxjBr5MP2E6MTZSOUmx-U_0rmHuOTruHytWyOZj982_W40X8_tFcO9rdc5
Do not share this token with anyone!!
Create Host on CoSync Portal #
The last step is really easy - we simply need to create the JojoHost on the CoSync Portal. First login to the CoSync Portal, and hit Create New Host

Next fill out the Host Parameters for creating the host as follows
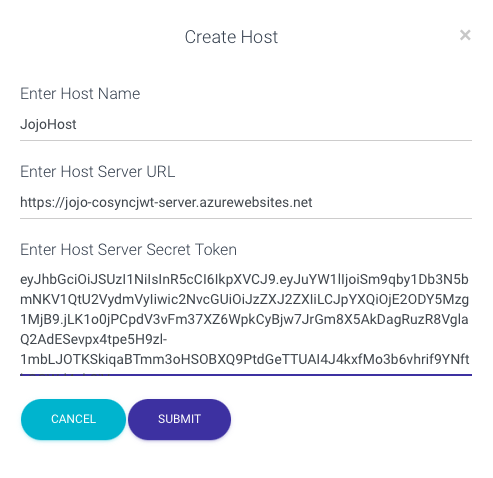
- Host name is JojoHost
- Host URL is the URL of the Azure App service
- Host Server Secret Token is what you pasted to the clipboard above
Hit Submit to create the host, and you should see:
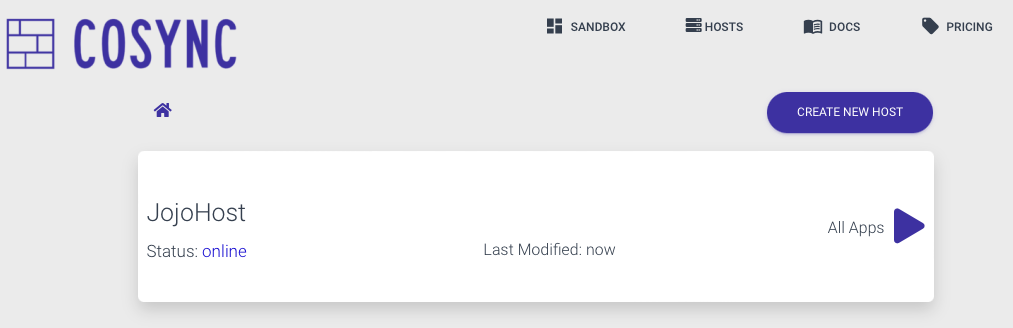
Congratulations, your self hosted authentication server is up and running, henceforth you can manage it through the CoSync Portal or the command line interface CLI.
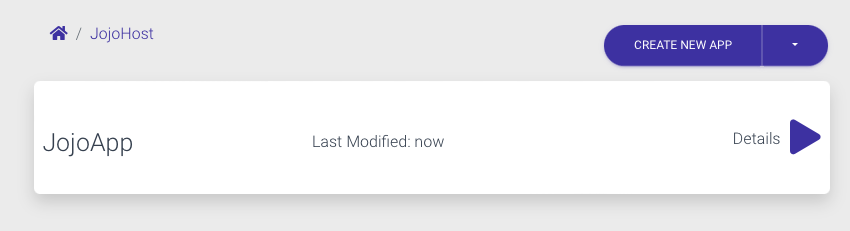
You are now ready to create your first application, go into the host and you should see after hitting Create New App
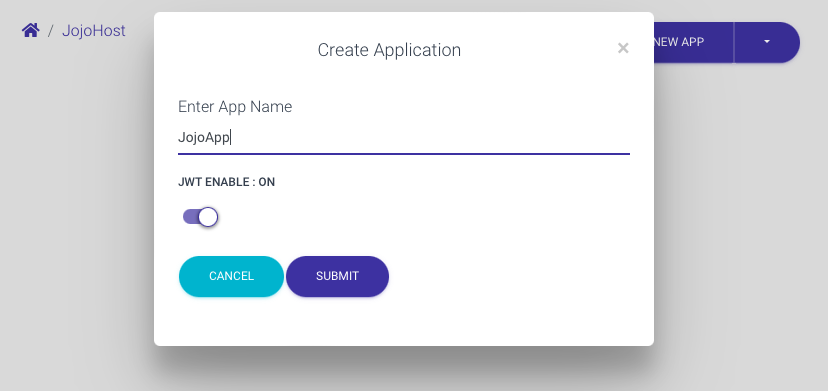
Hit submit to create your app.
Restrict MongoDB account to outbound Azure IP addresses #
By configuring our MongoDB Atlas cluster to enable the self-hosted CoSync Auth server, we inadvertently introduced a significant security vulnerability. To facilitate the setup of your self-hosted server, we made the MongoDB Atlas cluster accessible from any location. However, in this final step, it is crucial to address this vulnerability by restricting IP access solely to the outbound IP addresses associated with the Azure App Service that powers the CoSync Auth server. The good news is that implementing this restriction is a straightforward process.
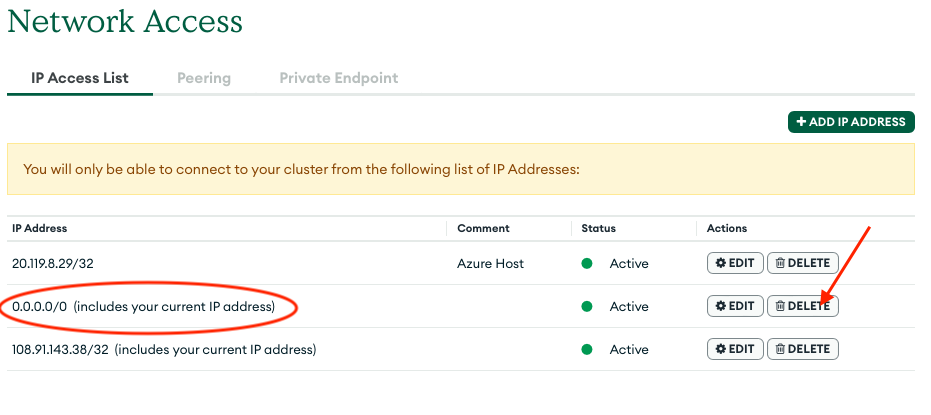
To fix this security issue, you will need to remove the ALLOW ACCESS FROM ANYWHERE from the Network Access tab in the MongoDB Atlas portal under Data Services. You will then need to add the outbound IP addresses from your Azure App Service that hosts the CoSync Auth self hosted server to MongoDB.
To delete ALLOW ACCESS FROM ANYWHERE, simply remove the 0.0.0.0/0 row from the Network Access table, by pressing the DELETE button.
In the next step, you need to retrieve the list of outbound IP addresses for your Azure App Service that is hosting the CoSync Auth Server application. Go to the App Service tab, and scroll down to the Networking section as shown below. Make sure to retrieve Additional Outbound IP addresses as well.
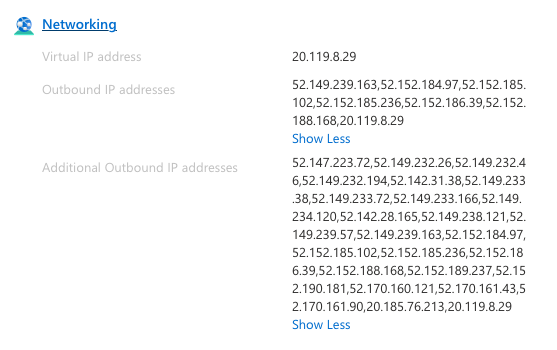
For each IP address that is listed, make sure that you add it to MongoDB Network Access, to white list access from Azure to MongoDB. Once you are done, you are guarenteed that only your App Service will be able to access MongoDB Atlas, and no one else.