Amazon S3 Setup #
Overview #
Setting up Amazon S3 to integrate with MongoDB Realm via the CoSync AssetLink module is a simple task. The developer needs to create an Amazon S3 user with access keys and two storage buckets. To configure the MongoDB Realm Application through the CoSync Portal, the developer will need to collect the following information.
- AWS user access key
- AWS user secret access key
- AWS S3 public bucket name
- AWS public bucket region code
- AWS S3 private bucket name
- AWS private bucket region code
In the next section, we guide the developer through the process of creating an Amazon S3 user with a set of API keys. Additionally, we’ll demonstrate how to create the Amazon S3 buckets that will store all assets uploaded from a MongoDB Realm application via the CoSync AssetLink module.
Amazon S3 Users & Groups #
This document is not intended to serve as an exhaustive guide to configuring the Amazon AWS S3 Storage service. It is assumed that developers have a basic understanding of the service as a prerequisite. For more comprehensive information about the S3 Service, please refer to this link. Nonetheless, we will discuss the specific adjustments needed to integrate Amazon S3 with a MongoDB Realm application that uses the CoSync AssetLink module.
Programatic Access #
To enable MongoDB Realm App Service functions to communicate with the Amazon S3 Storage service, the developer must create a user with Programmatic Access in their AWS account via the IAM service. Programmatic Access means that the developer needs to generate an Access Key ID and a Secret Access Key that will be used by the MongoDB Realm App Service functions to call the AWS API. These keys are generated during the process of adding a new user with programmatic access to AWS. It’s important to save these keys to a CSV file during this process, as they cannot be retrieved later. Additionally, these keys should not be shared with anyone, as they grant complete access to the Amazon S3 account. Although the CoSync Portal requires these keys to configure the MongoDB Realm App Service associated with the client application, it does not store them in its database. The developer is solely responsible for the secure storage of these AWS access keys. These keys are stored inside the functions of the MongoDB App Service.
The process of creating a group and a user through IAM, described below, is not necessarily the optimal method for configuring Amazon S3 but is simple enough for most developers to get started.
As a prerequisite for creating a user with programmatic access to AWS, the developer should first create a group with an attached policy of AmazonS3FullAccess to grant full access to AWS.
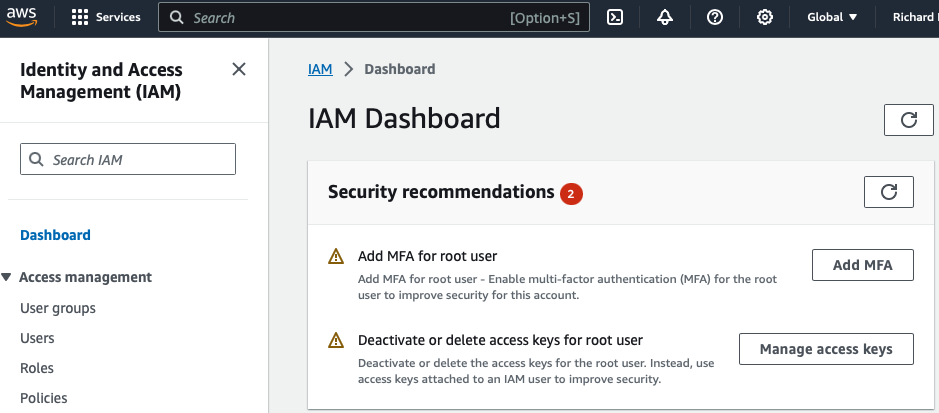
To begin this procedure, search for the IAM service in the AWS portal and open the IAM dashboard.
Group Creation #
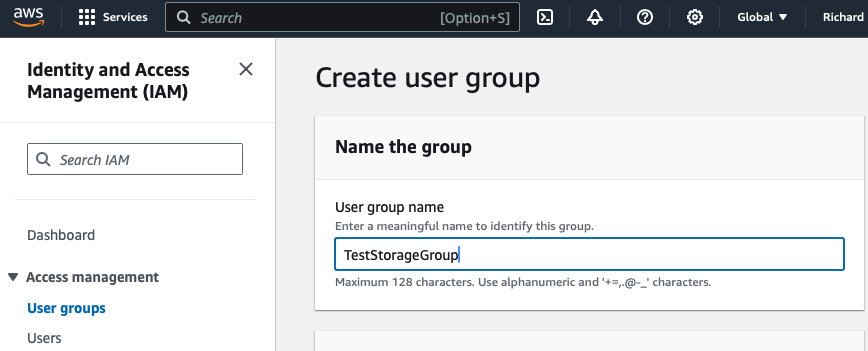
- Create the group
Click on the “User groups” subtab, and click Create group
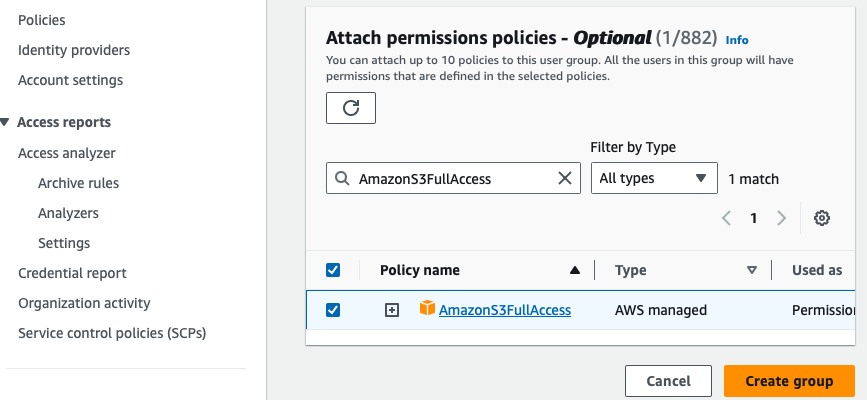
- Attach the policy
Attach the policy AmazonS3FullAccess to the group CosyncStorageTest.
In Amazon S3, the group object effectively associates a policy with a group entity that can subsequently be assigned to a new user. In Amazon S3, users can be members of groups, and through these groups, they inherit policies that regulate access to the S3 resources.
User Creation #
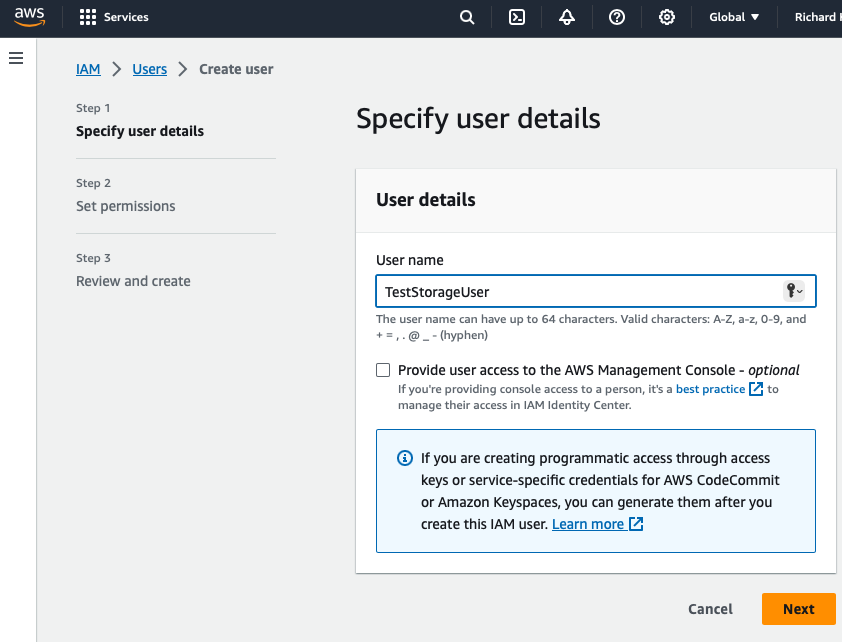
- Create the user
Click on the “Users” subtab, and click Create user.
- Add the user to the new group
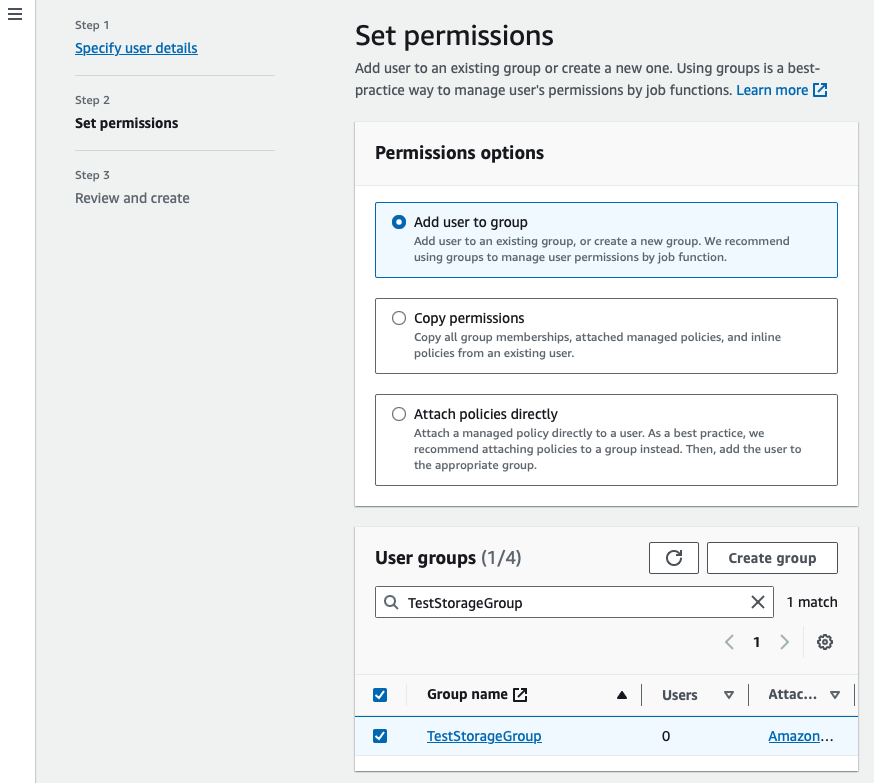
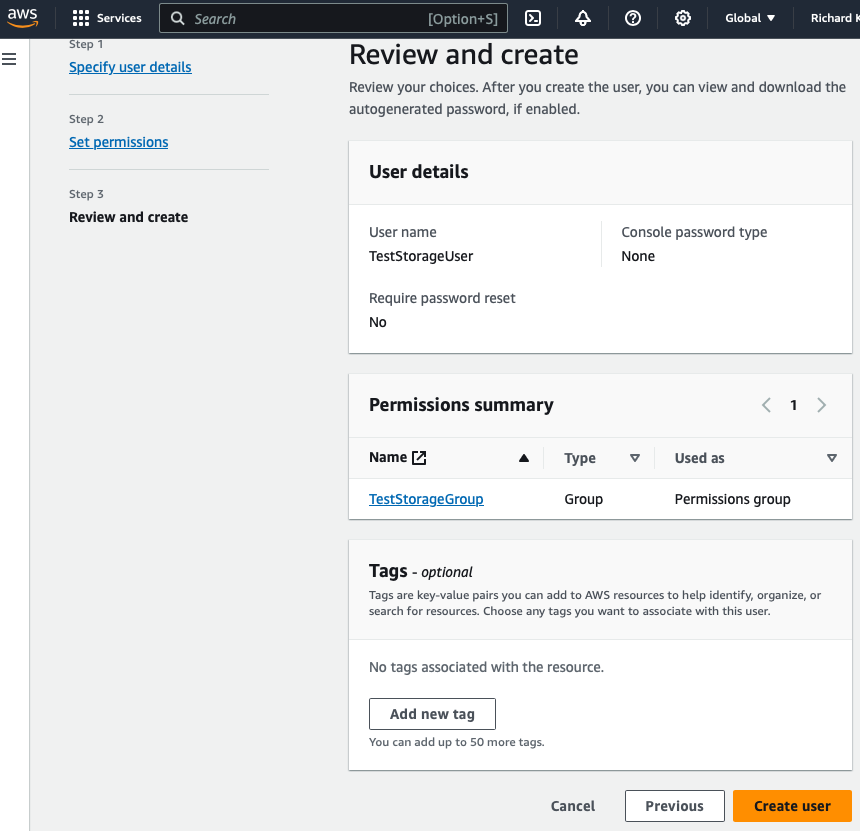
- Review and create user
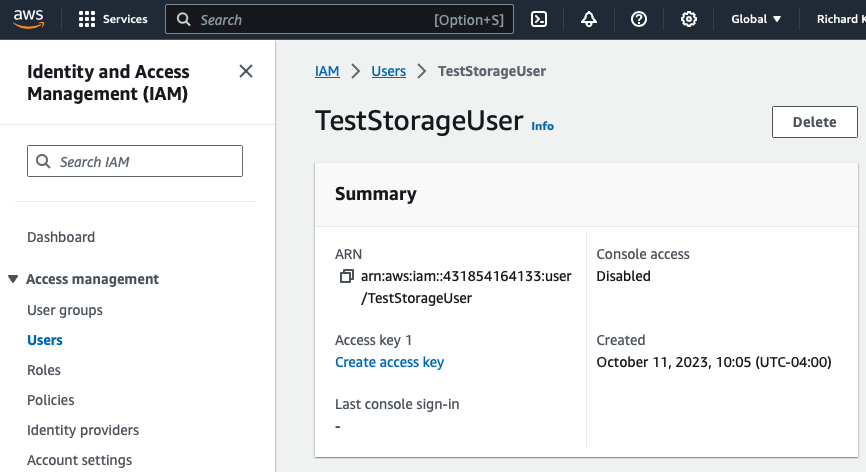
- Go to new user and click Create access key
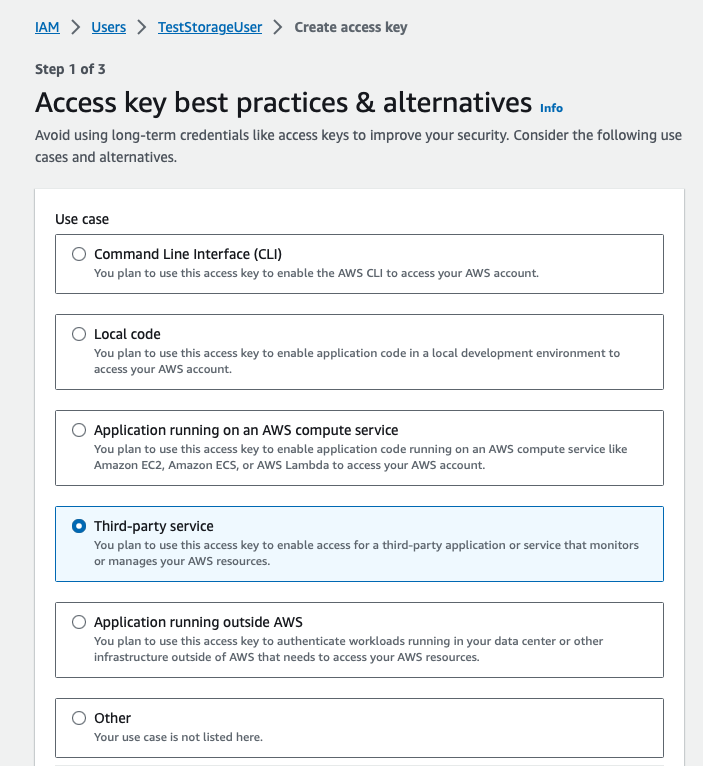
- Select Third-party service
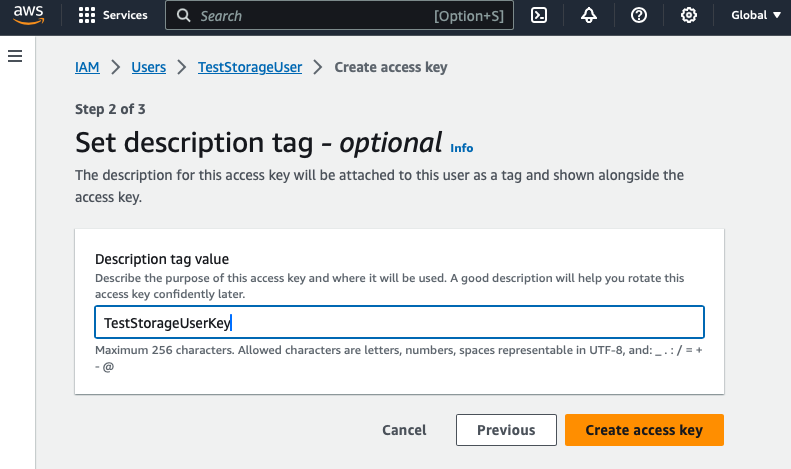
- Name the Access Key and hit Create access key
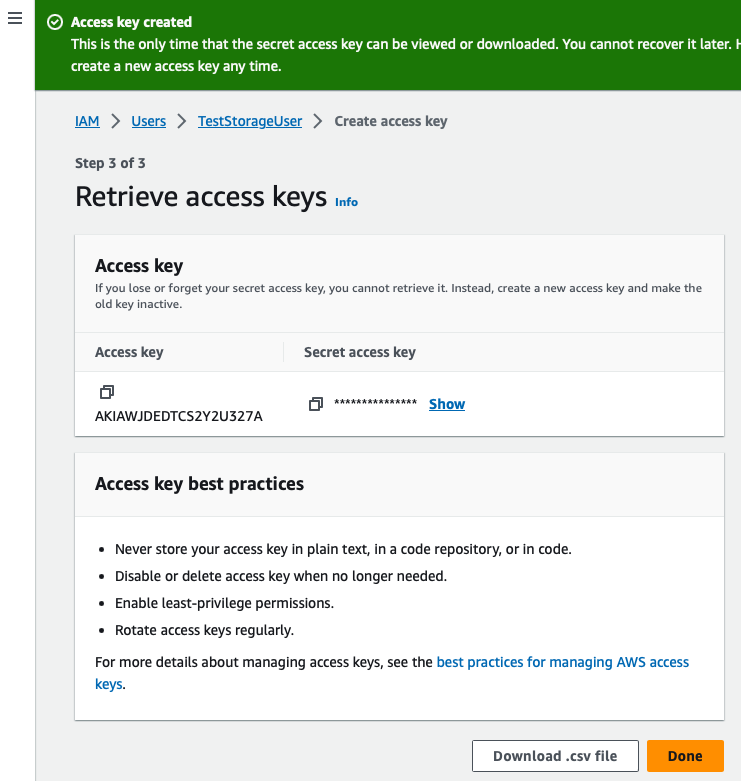
- Save the Access key and the Secret access key to a file for safe keeping
Amazon S3 Buckets #
The last step in setting up Amazon S3 to work with a MongoDB Realm client application involves creating two buckets to store all the assets. One bucket is designated for public assets (non-expiring), and the other is for private assets (expiring). In S3, a bucket is the highest level container used to store asset data. Each file stored in a bucket has a unique path and can be accessed via URLs by external entities (whether expiring or not). These two buckets are referred to as the Public Bucket and the Private Bucket, respectively.
Anatomy of a bucket #
The directory structure beneath an Amazon S3 bucket used with the CoSync AssetLink module is organized as follows. In the Public Bucket, the top-level directories directly under the bucket are named after the Realm user ID of the user who uploaded the asset to the bucket, placed under the public directory. The Private Bucket has a similar structure, excluding the public directory.
Beneath each user directory, the developer can specify an arbitrary path, such as /avatar. For instance, if a user with the user ID 5ff481a161c490458f8e2c3f uploaded an asset named mugshot.jpg to a path called /avatar, the CoSync AssetLink module would generate cuts with an appended timestamp - for instance, 1609859729341. Similarly, if a user with the user ID cb6b7d76cb515cc07557b8a6 were to upload a non-expiring public asset to the path /backgrounds, the resulting asset would be placed under the public branch, as shown below.
test-storage-bucket-public
└── public
    ├── 5ff481a161c490458f8e2c3f
    └── cb6b7d76cb515cc07557b8a6
        └── backgrounds
            ├── texture-1609859729348.jpg
            ├── texture-large-1609859729348.jpg
            ├── texture-medium-1609859729348.jpg
            └── texture-small-1609859729348.jpg

test-storage-bucket-private
└── 5ff481a161c490458f8e2c3f
    └── avatar
        ├── mugshot-1609859729341.jpg
        ├── mugshot-large-1609859729341.jpg
        ├── mugshot-medium-1609859729341.jpg
        └── mugshot-small-1609859729341.jpg
Add a bucket to Amazon S3 #
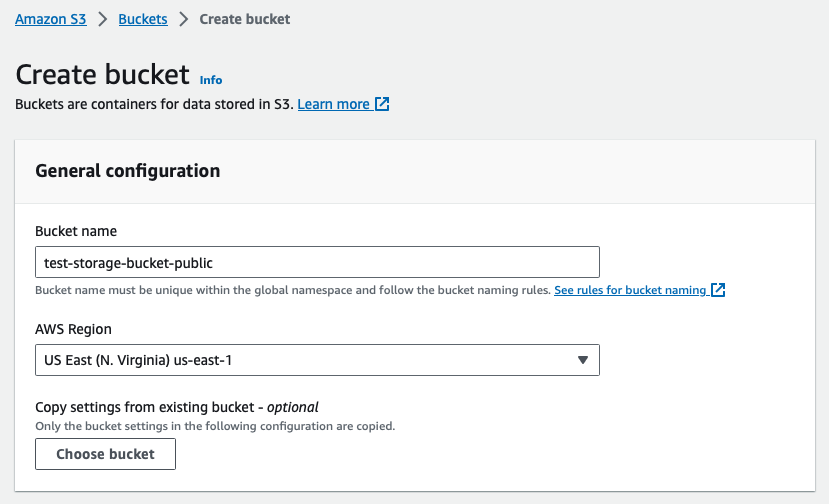
Adding a public bucket to Amazon S3 is very easy. To do so, the developer must first go to S3 page within the AWS Console and hit Create bucket. The bucket name must be lowercase.
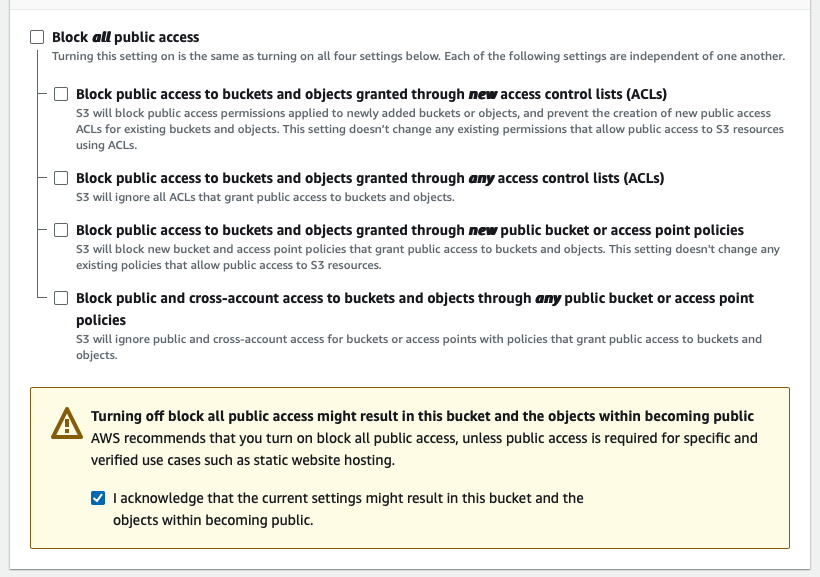
Before the bucket is created, the developer must uncheck Block all public access to make the assets in the bucket accessible to the MongoDB Realm client application.
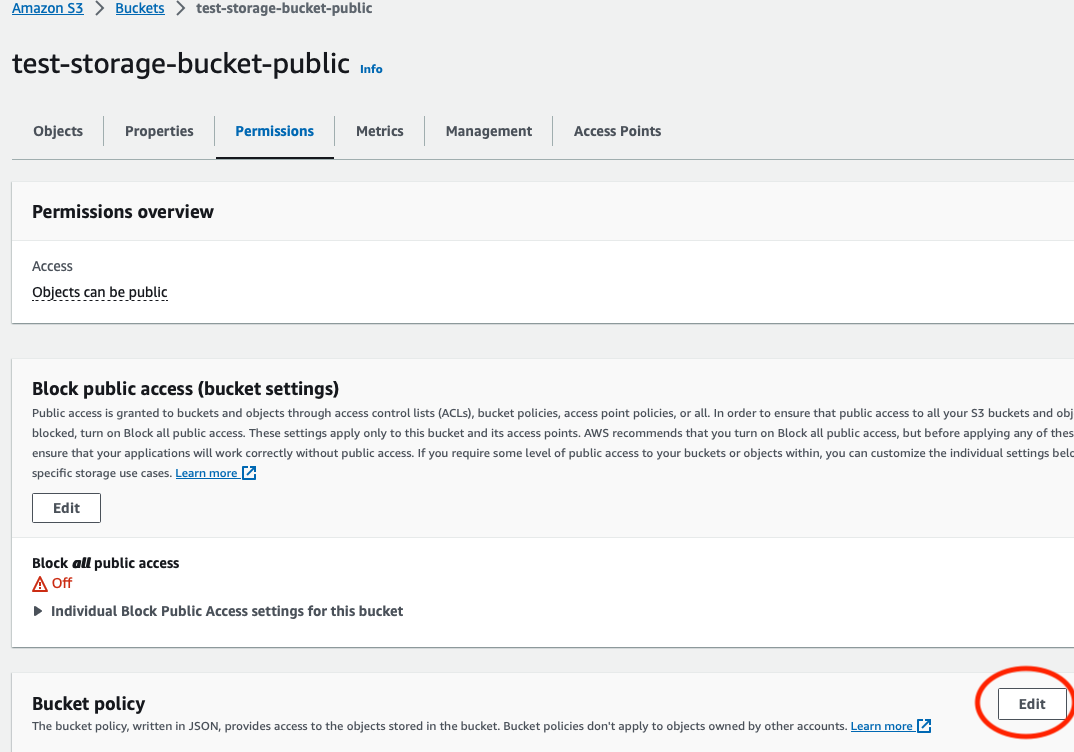
After the bucket is created, the developer must click on the bucket and go to the Permissions tab and edit the bucket policy. The developer should click Edit on the Bucket policy.
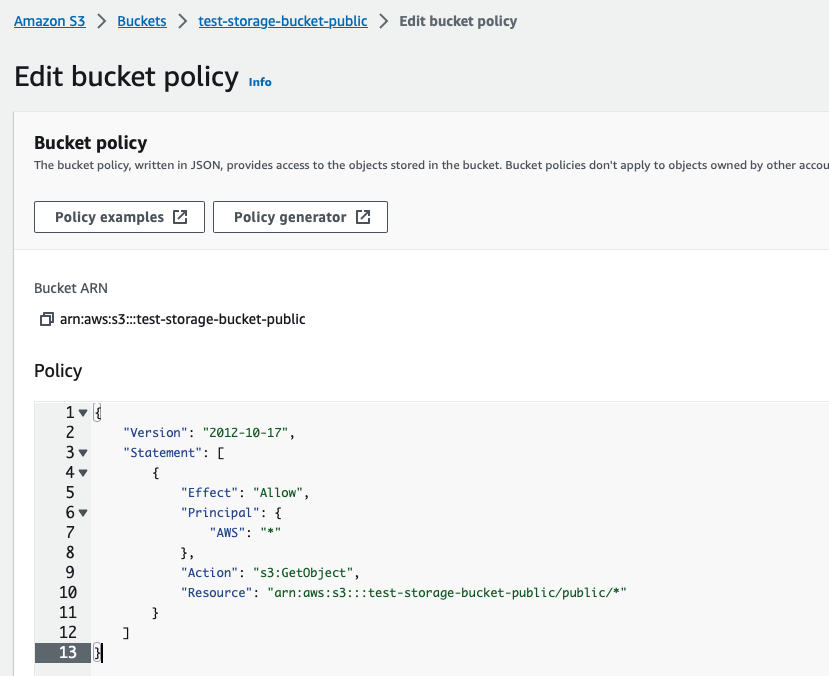
The developer must change
{
    "Version": "2012-10-17",
    "Statement": [
        {
            "Effect": "Allow",
            "Principal": {
                "AWS": "*"
            },
            "Action": "s3:GetObject",
            "Resource": "arn:aws:s3:::<name of bucket>/public/*"
        }
    ]
}
In practice this looks like this:
Once the bucket policy has been set, the developer is ready to integrate the Amazon S3 public bucket into the MongoDB Realm Application using the CoSync AssetLink module.
In the list of buckets, the public bucket should look as follows:

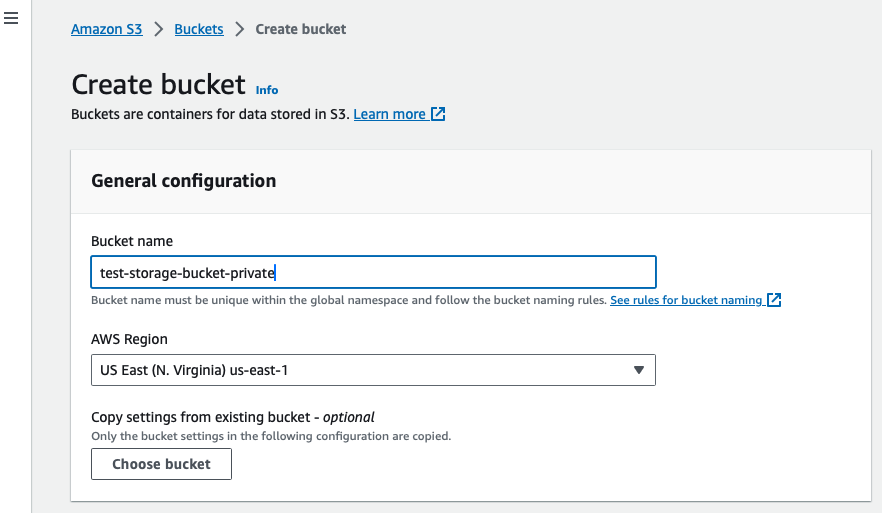
Adding a private bucket to Amazon S3 is even easier. To do so, the developer must first go to S3 page within the AWS Console and hit Create bucket. The bucket name must be lowercase.
The developer does not need to change any policies and should just click Create bucket. The resulting bucket in the bucket list should look as follows:

Region Code #
The region code for the AWS S3 bucket can be retrieved directly from the list of buckets. In the example below, the region codes for both buckets is us-east-1. This may vary depending on the locale of the developer.